Dynamic fields are used to allow client/site specific customisation to MiiNT without having to make changes to the core product and issue a new release/build.
Note: Dynamic fields can only be added to tables that have been defined for this purpose in the data model.
WARNING: DO NOT add records directly to the database for tables that may contain dynamic fields.
The table below lists the Tables that dynamic fields can be added to, at the time of writing this topic.
Table | Description |
---|---|
BlaDhc |
Blast DH Consumables |
BlaDhe |
Blast DH Explosives |
BlaPer |
Blast Performance |
BlaSum |
Blast Summary |
BloMat |
Block Material |
Dayworks |
Dayworks |
DriPro |
Drill Production |
DriSum |
Drill Summary |
EquHou |
Equipment Hours |
EquSta |
Equipment States |
Haul |
Haul |
HolCav |
Hole Cavities |
HolInt |
Hole Intervals |
HolPar |
Hole Parameters |
Load |
Load |
SafDet |
Safety Detail |
SafSum |
Safety Summary |
ShiSum |
Shift Summary |
SurMin |
Surface Mining |
Water |
Water |
To view and manage the current dynamic field lists and their mapping within MiiNT click on the Master Configuration > Dynamic Fields option to display the master data associated with Dynamic Fields that can be maintained.
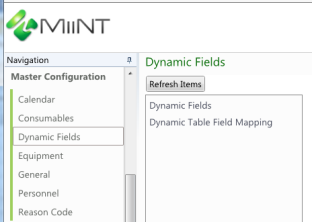
This table below lists the Dynamic Fields tables that can be managed:
Tables | Description |
---|---|
Dynamic Fields |
List of dynamic fields that have been created to allow client customisation. These fields need to be mapped to a table. Note: Dynamic fields can only be added to tables that have been defined for this purpose in the data model. |
Dynamic Table Field Mapping |
List of the dynamic fields that have been mapped to the MiiNT tables. Note: The dynamic field needs to be created before it can be mapped to a table. Note: A dynamic field can be mapped to several tables. |
This table below lists the fields displayed for the Dynamic Fields table.
Field | Value |
---|---|
Code |
Type the code of the dynamic field, this should be the code used to identify the dynamic field. |
Description |
Enter the description of the dynamic field. The description is what is displayed in query builder and in reports |
Data Type |
Assign a valid data type using the button to display a list of available data types. Refer to table below for information about the different data types. Note: A Data Type must exist before it can be assigned to a dynamic field. |
UOM |
Assign a valid UOM using the button to display a list of available units of measure. This field is optional. Note: A UOM Code must exist before it can be assigned to a dynamic field. |
Note: The above fields should be used as a guide only as tooltips can be used to customise the field names for your configuration.
The table below lists the Data Types that can be assigned to dynamic fields:
Data Types | Description |
---|---|
Decimal |
For numeric values with decimal places. Note: The Adding SQL script default 0. |
Currency |
For monetary values or precise financial calculations. Note: The Adding SQL script default 0. |
Integer |
For non-decimal numeric values. Note: The Adding SQL script default 0. |
Boolean |
For true or false values. Note: The Adding SQL script default 0. |
String |
For values that include letters, numbers, spaces, symbols and punctuation. Note: The Adding SQL script default ‘’. |
Date |
For date values. Note: The Adding SQL script default is base date 1900-01-01. |
DateTime |
For date time values. Note: The Adding SQL script default is base date 1900-01-01. |
Time |
For time values. Note: The Adding SQL script default is base date 1900-01-01. |
TimeSec |
For time values in seconds. Note: The Adding SQL script default is base date 1900-01-01. |
This table lists fields displayed for the Dynamic Table Field Mapping table.
Field | Value |
---|---|
Table |
Assign a valid table to map the dynamic field with. |
Dynamic Field Code |
Assign a valid dynamic field code to the table. |
Note: The above fields should be used as a guide only as tooltips can be used to customise the field names for your configuration.
Refer to the Data Management Pages topic for information on how to Add dynamic field records.
Note: Once a dynamic field has been created it will need to be mapped to a table.
Refer to the Data Management Pages topic for information on how to Add records to map a dynamic field to a table.
The following steps will need to be performed after dynamic fields have been added to tables:
Reload your browser session and log on again, so that the dynamic fields are available on the table that they have been mapped to.
Any existing write-backs that are writing to the table that has had a dynamic field added will need to be remapped. Refer to Write-back section below.
Note: Writebacks are used in the Excel spreadsheets to upload data
Write-backs need to be updated so that they recognise new dynamic fields.
In the following steps a write-back that is used for the uploading of equipment standby information for drilling will be used to demonstrate how to update the write-back with the Dayworks and Dayworks Description dynamic fields that have been mapped to the Equipment States table.
Click the Browse button next to Table > Equipment States
In the Write-back Tables window select the Equipment Performance > Equipment States table, then click OK.
Note: The Dayworks and Dayworks Description dynamic fields should be added to the Fields tab.
Remap the write-back fields, using the screenshot taken earlier to assist. Right Click on the Duration field and select the Driver option.
Note: A driver field is identified by an * next to its name and a bold value. When selected the selected field frame will state that this is the current driver Field.
In the below example the Duration field has been assigned as the driver field.
Enter 0 in the Dayworks Description field and =$D$14 in the Dayworks field.
Click Close, and Yes when prompted to save.
Note: This will need to be repeated for any other write-backs to the Equipment States table.
The table below lists the actions for the Write-back buttons:
Buttons | Actions |
---|---|
Preview |
A preview of the records that will be uploaded to the database when the Execute button is selected. |
Validate |
Validation that compares the source records with the write-back definition in the DataModel to verify that all records are valid. |
Execute |
The records will be uploaded to the database. |